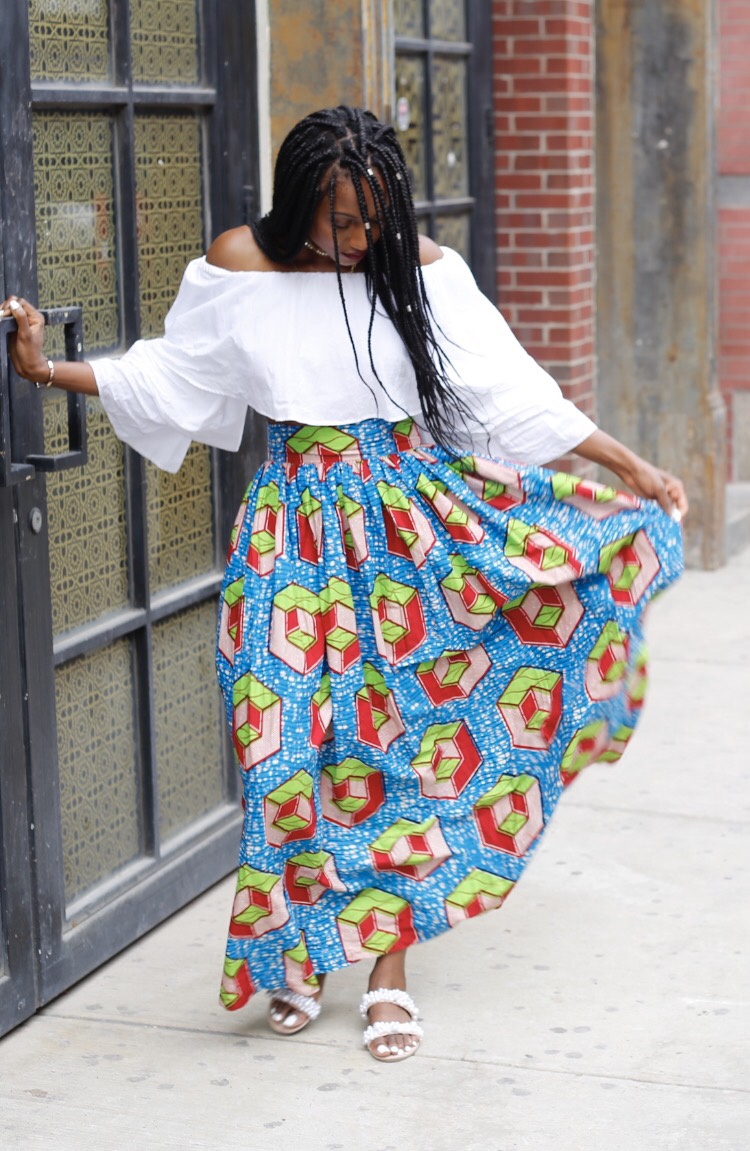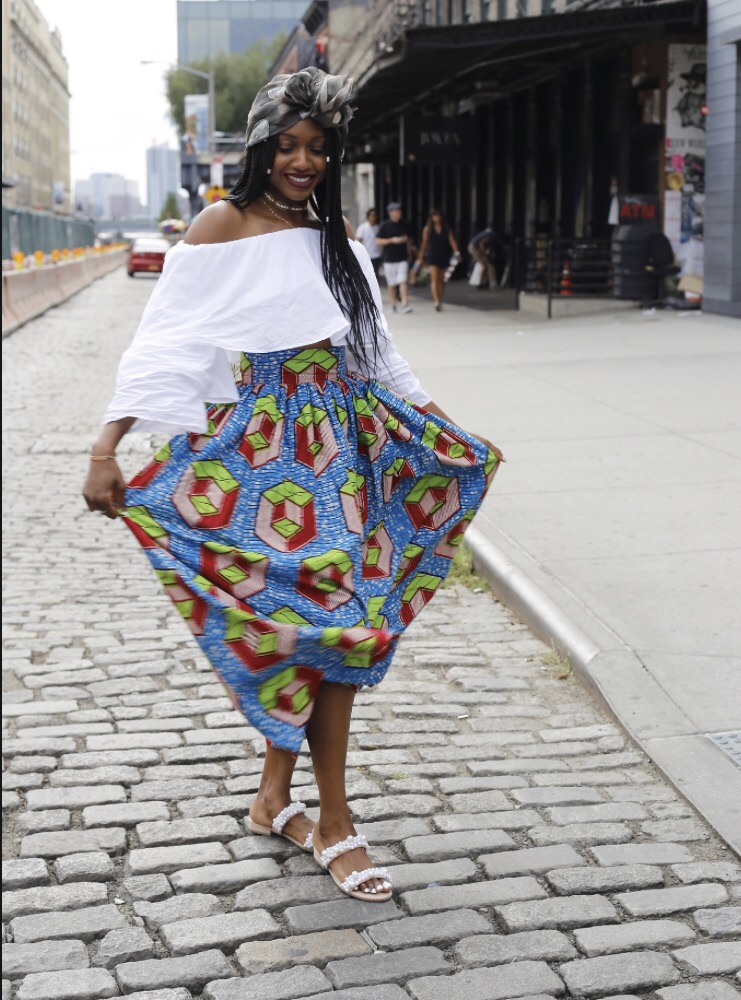
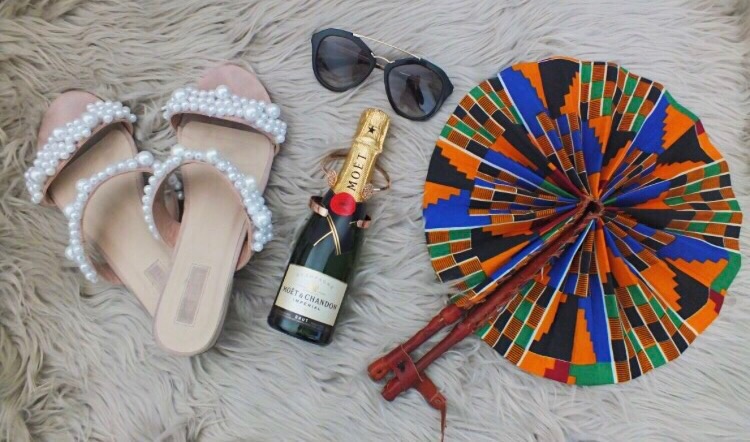
 I cannot believe it’s September! It’s almost that time to bid adieu to summer time! Nevertheless, I will continue wearing sandals up until, I just can’t! Here’s a DIY I did to make my favorite summer sandal. I’m sure you’ve seen your favorite blogger and influencer in the black, pearled sandals from Zara. They are for sure the Zara ‘it’ item. Every season there becomes a “must-have” item from Zara that everyone gets. These pearl sandals were the summer must-have and they’re sold out; they also were not included in the summer sale. I wanted to get them, but realized I could make a version myself. For a third of the price, $20 vs $60, I achieved this pearl look. I must say that I’m living for these trends of embellished footwear from pearls, to tassels, to pom poms.
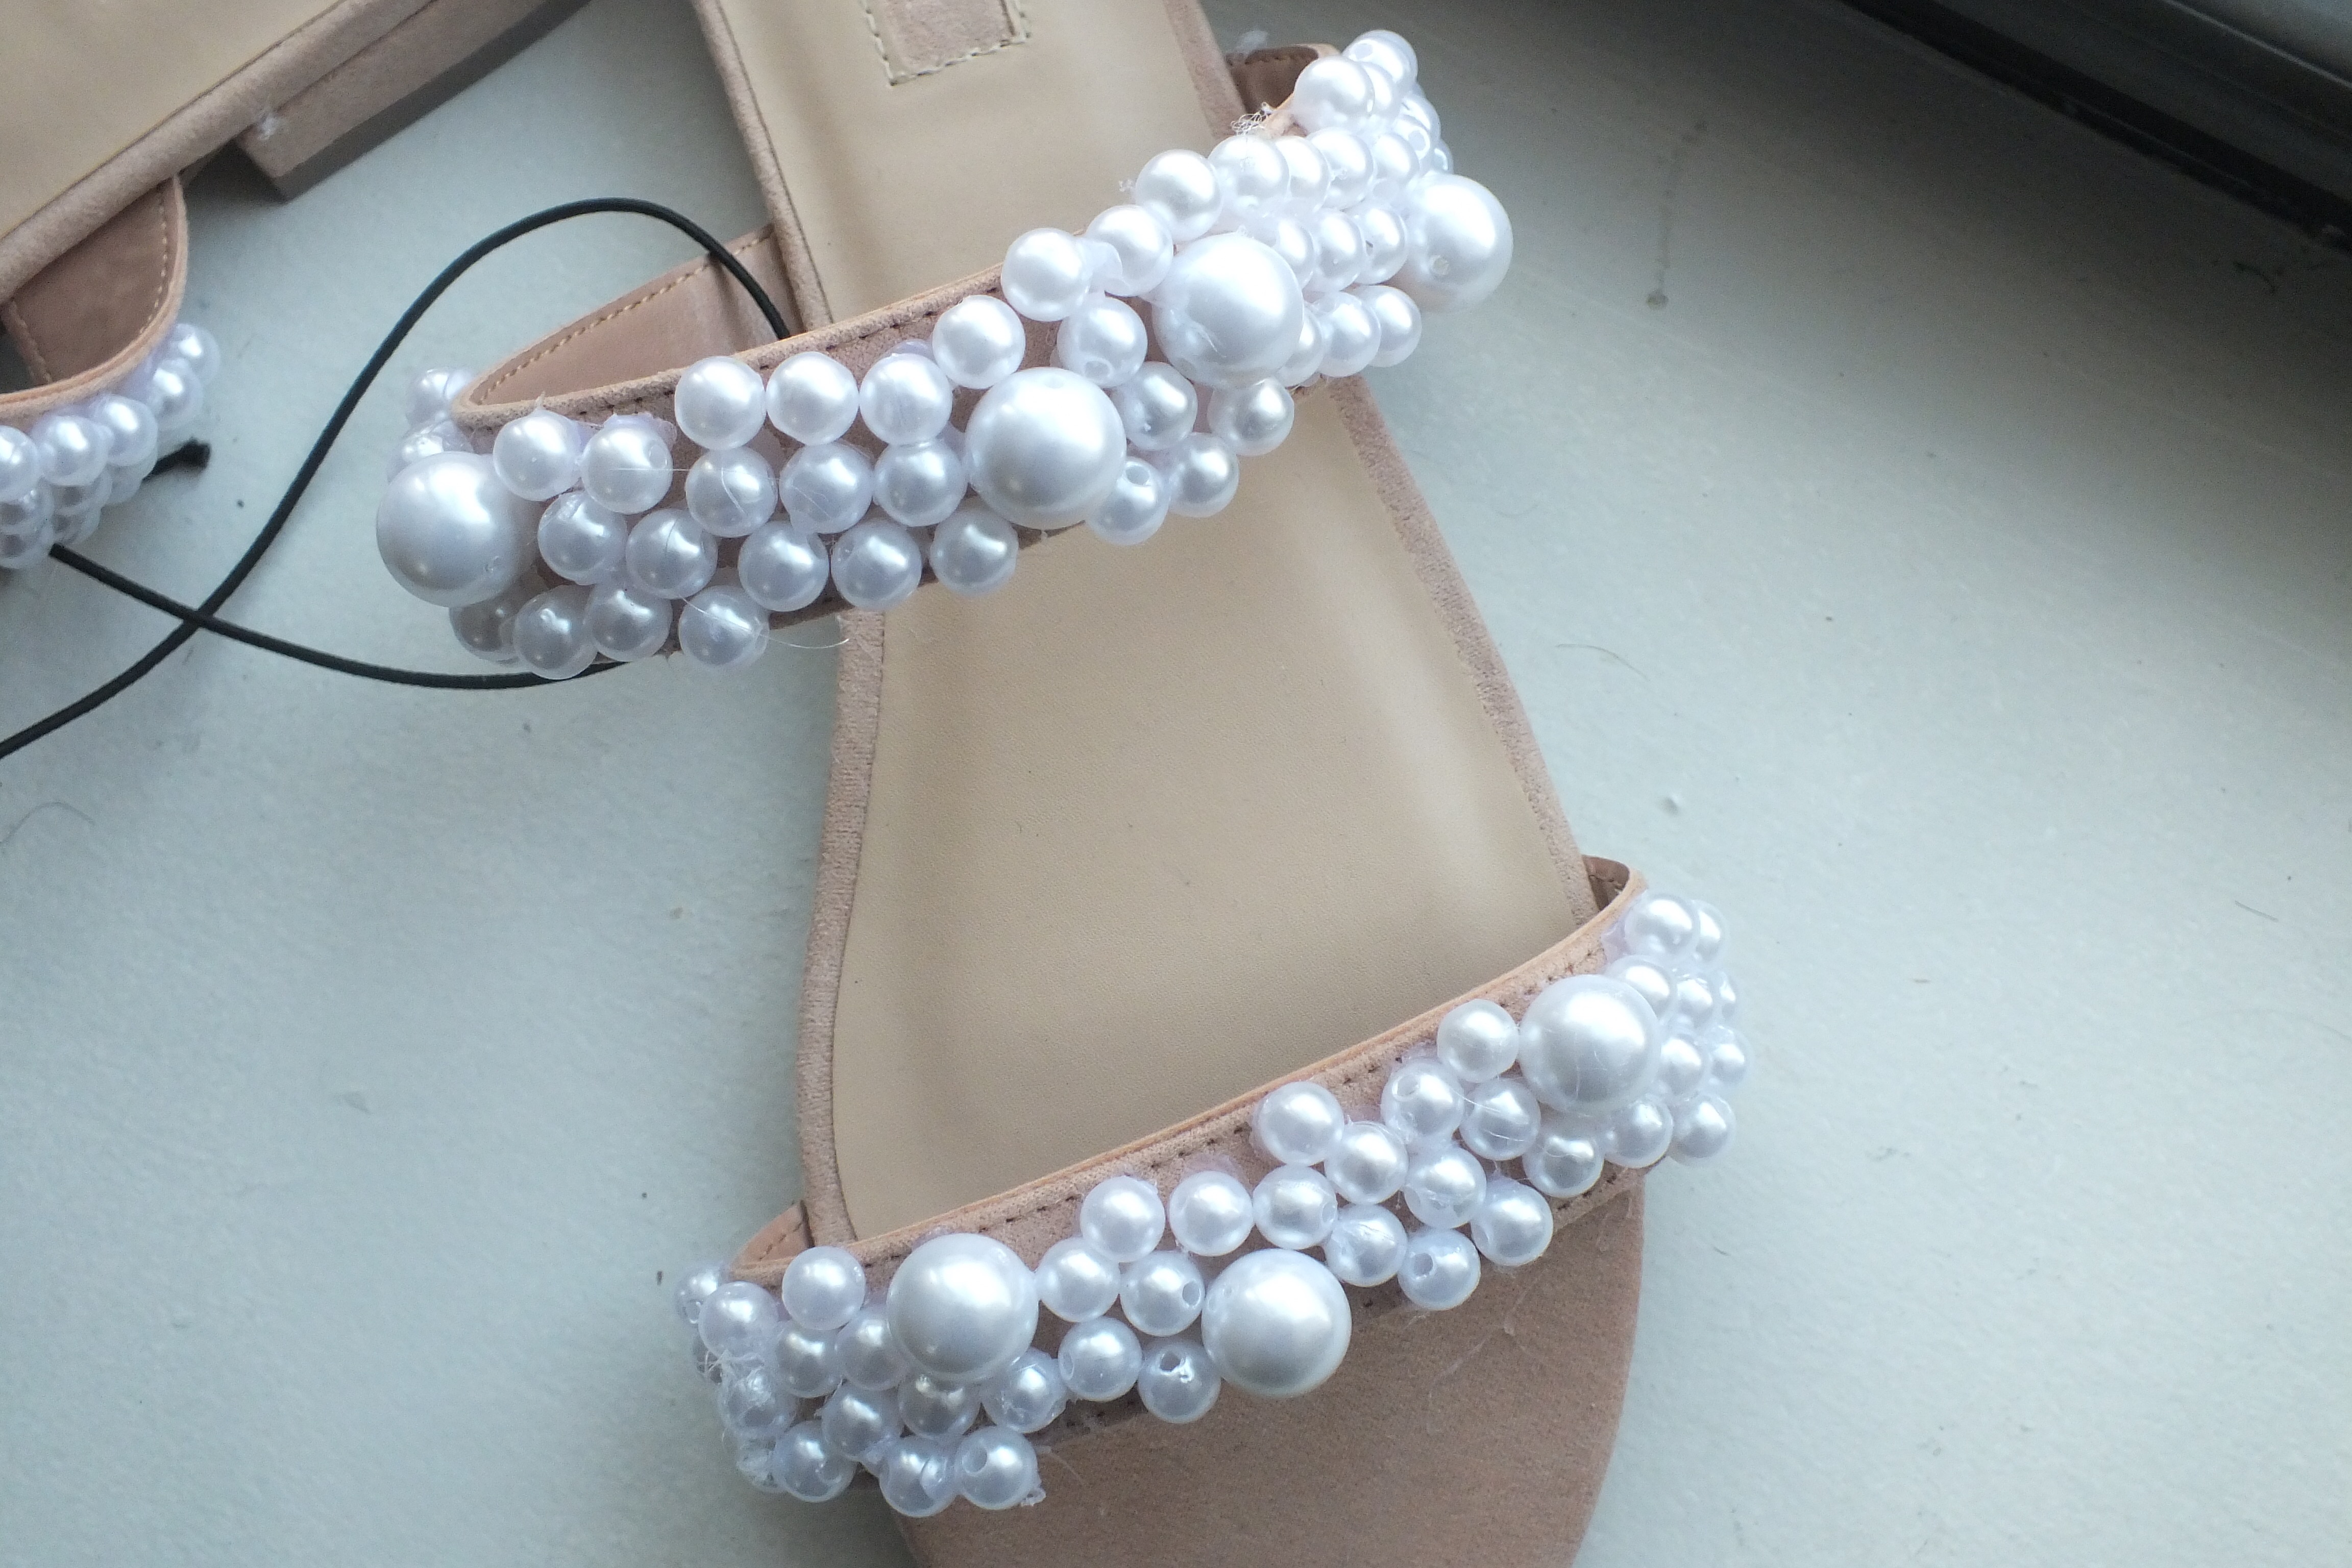
This is a fairly simple DIY that requires just a bit of patience. Crafting makes me so happy, as I sat and added each pearl, I was so content. As I know, not everyone is like this, I think this sandal is easily achievable.
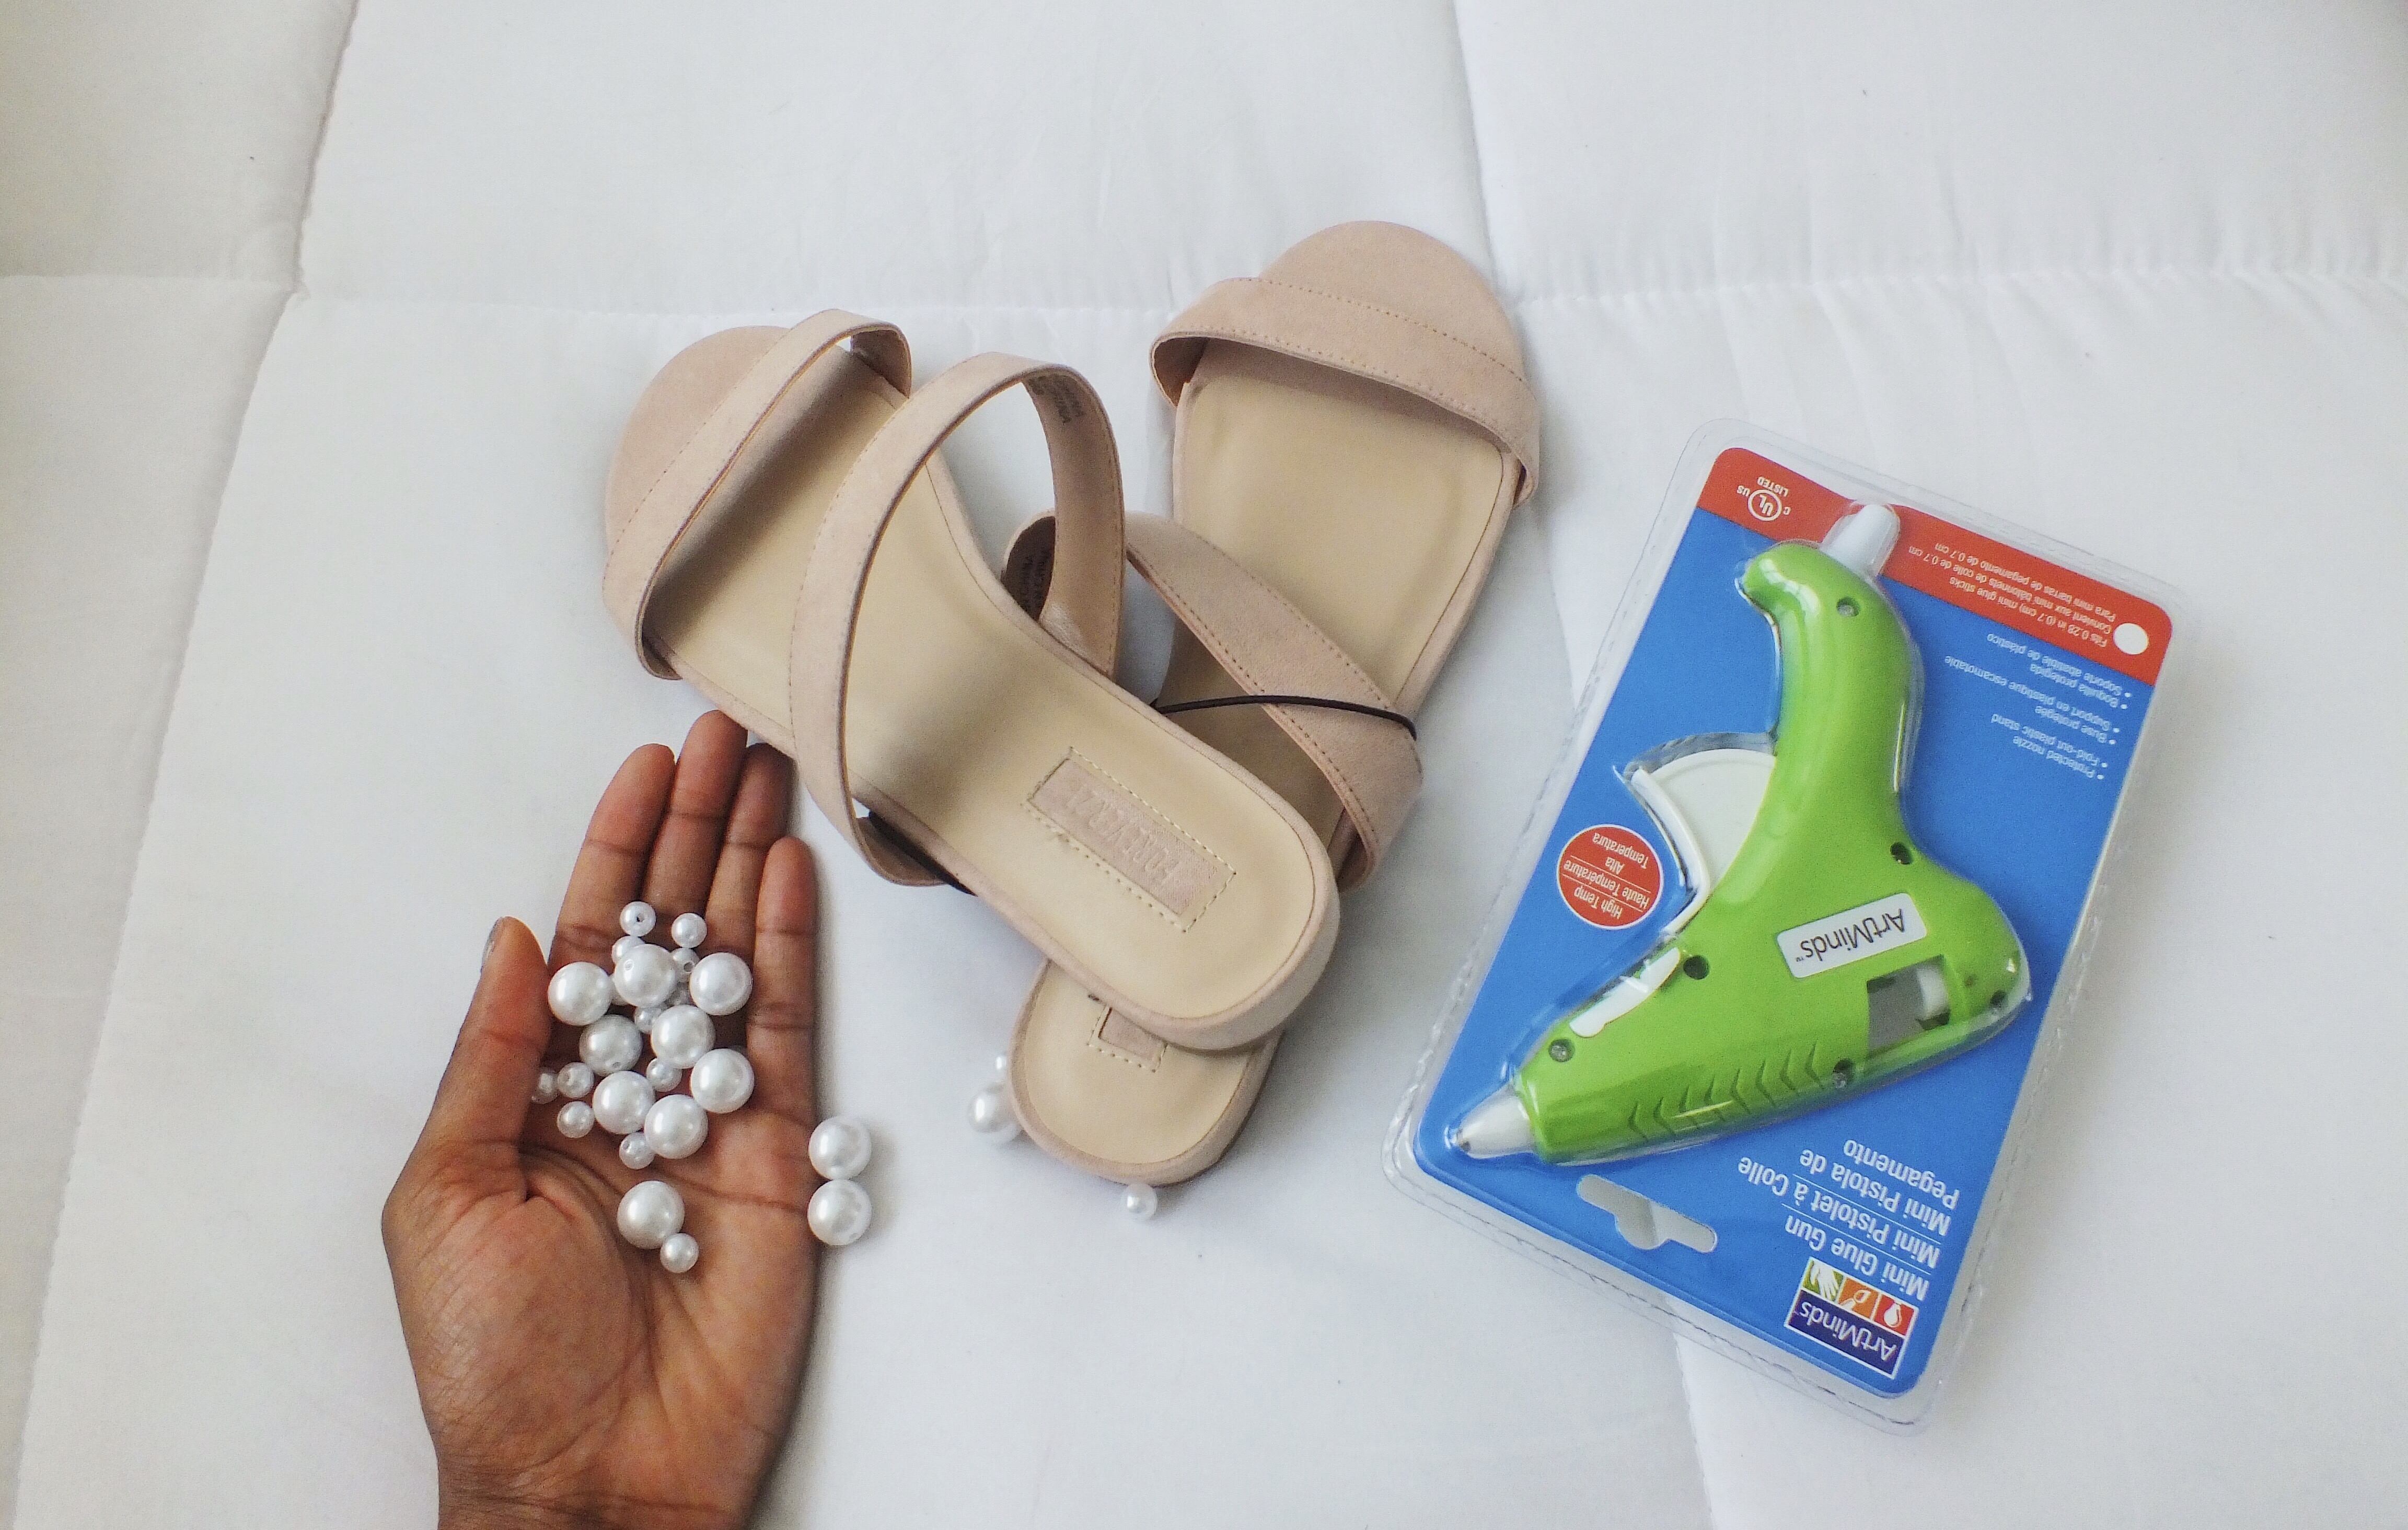
Supplies:
- Plain strappy sandals- I got this nude pair from Forever 21 on sale for $11. I wanted black and three straps like the Zara, but didn’t have much luck finding a pair.
- Two sizes of craft pearls- They can be ordered from Amazon or found at a craft store like Michael’s or JoAnn’s
- Glue gun- If you don’t already have one, but you can get one for the low at Michael’s etc
- Gorilla/ Super Glue to reinforce- To use SPARINGLY, it has a super strong effect on these pearls
- Turn on some Netflix and begin! Then use the hot glue to apply the pearls onto the sandal straps. I used smaller pearls and sprinkled a few larger pearls amongst them.
- Apply the pearls in a nonlinear pattern and add in 4-6 larger pearls per strap.
- Once finished, fill in any small holes with Gorilla or super glue. VERY important to note that super glue is so strong it will pull the enamel off of these craft pearls, and then get stuck to your fingers… speaking from experience. So to avoid this, let a very small amount come out of the dripper. You might think, let me just avoid this, but a stronger glue is needed to reinforce the hot glue or else pearls could be a little bit loose. When I first made these, I didn’t have super glue and eventually was somewhat of Goldilocks with a trail of pearls. Once I went back and did this super glue step, they were good to go!
The great thing about this DIY is it’s low cost, but looks high quality. There’s just something about pearls being associated as fancy. I got quite a few complements. I love the satisfaction that I made them instead of buying the popular pair. This fall, I will most definitely come up with a seasonal DIY incorporating pearls.